Friday, July 13, 2012

Gluing the seats

Turned the hull over. During the last boat I built, I forgot to paint under the seats before they were epoxied down; what a pain (I did it with a my arm covered in a elbow high glove and several cans of spray paint. I didn't repeat that mistake.

I marked up where supports landed under the seat and painted between them as well as the compartment. The picture also shows the hatch plate support and the doubler that fits under curved extension beyond the bulkhead support.


To fit the seat, I covered the bare wood underneath with thickened epoxy, used a few clamps where they could reach and used drilled through round scraps down the center line into the support splines to hold everything down. On prior boats, 

On prior boats, I've added support cleats and used fiberglass to tape the seat to the sides. On this boat, I decided to forgo the cleats and and add thickened epoxy faired to the sides. The first batch of epoxy was too thin and some ran into the hatch--wasting an ounce or so, but it's all hidden and was easy to fix.  


More bottom work

After a day of letting the dry fiberglass settle it was time for the epoxy. Started on a cool morning so I'd get plenty of time to work each batch and spread it slowly using a 3" plastic spreader. I started from the top centerline, giving it time to saturate the two layers of 4 ounce cloth and working it down the sides. I finished with the transom and was glad I'd rounded over the planks.

About eight hours later, I decided to apply the box rubbing strake and skeg I'd already fitted out. Any longer and I'd loose the chemical bond between the fillet supporting the skeg and fiberglass. You'll note in the picture I used a chalk line down the center line to help.


I also cut along the blue painters tape with a sharp razor and pulling the still flexible fiberglass. It's a trick I'd seen Warren Messer of redbarnboats use on one of his YouTube videos that worked really well. 

The rest didn't go so well. I mixed in a too much filleting blend into the epoxy to fill the weave. It made the 2nd layer a lot harder to apply and added more work to get a smooth finish. I finished the skeg fillets at this point with a thicker bonding filler. After a light sanding it's ready for paint. 


Friday, July 6, 2012

Fiberglass the bottom

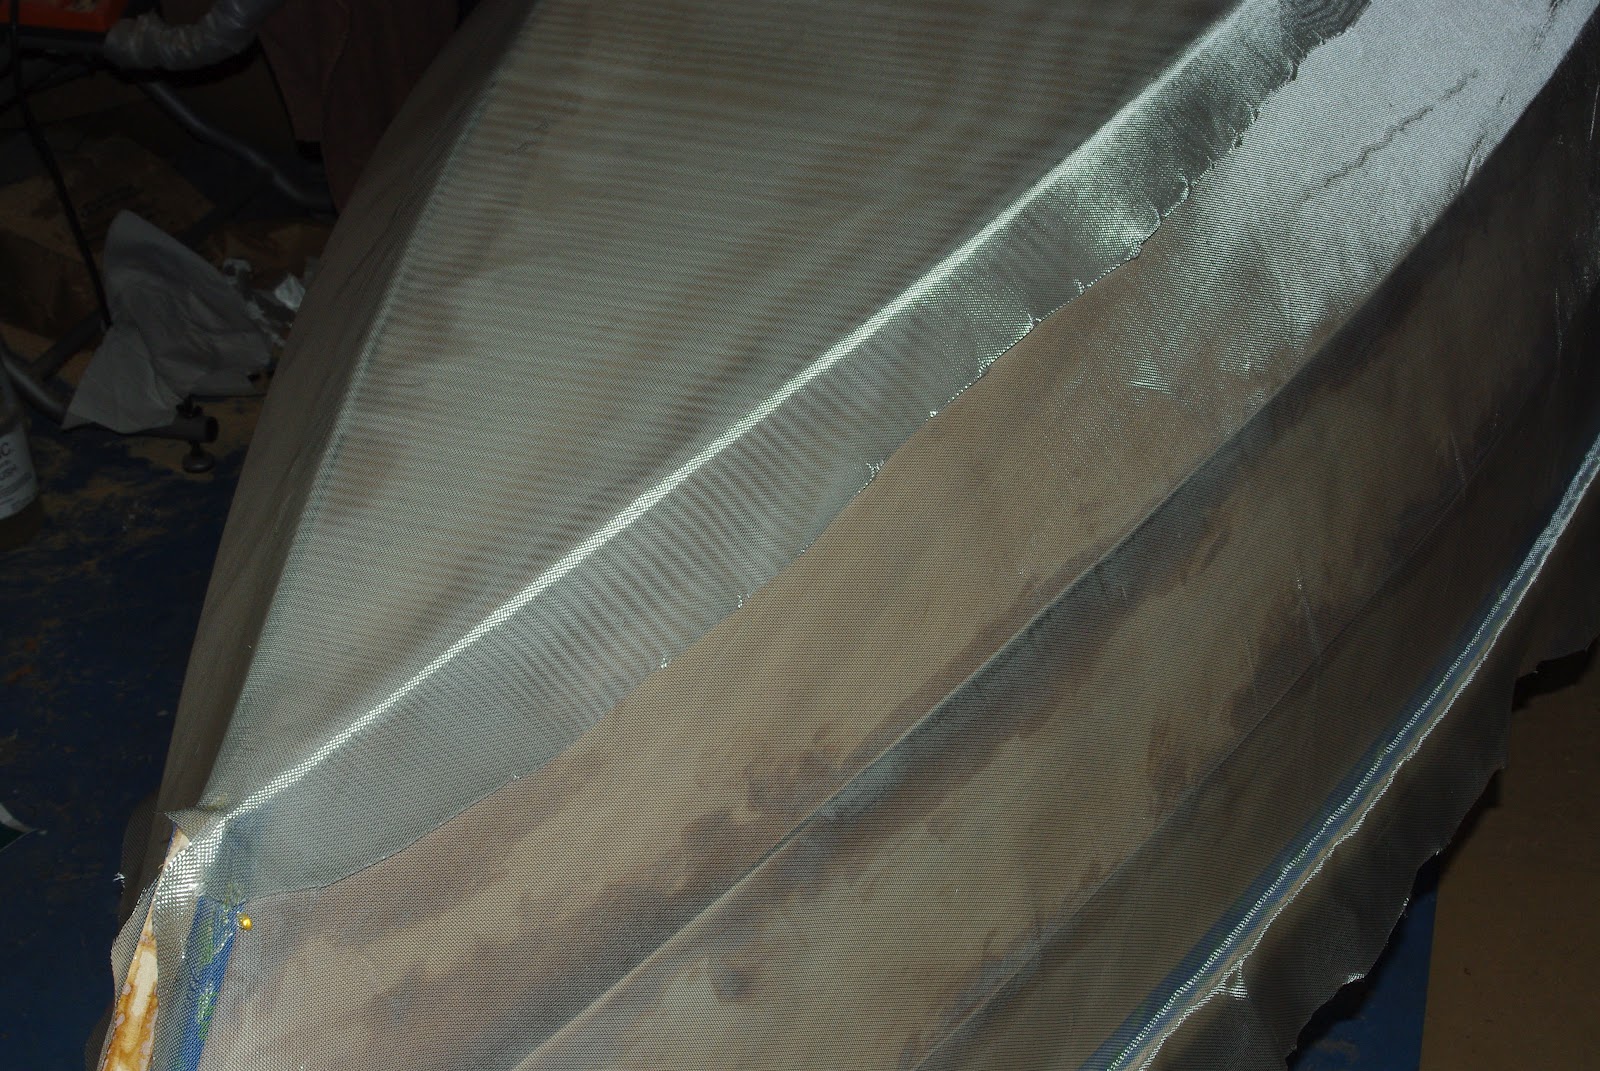
I decided to use 4 ounce fiberglass on the outside, but doubled in two layers over the bottom and lower chine. I needed two 50" wide overlapping strips. I applied 1" blue painters tape close to the gunwale. Next I laid out the first piece to completely cover the bottom plank dry carefully then running my hands stretching it down each plank and tacking it down with small dabs from a glue gun on top of the painters tape. I trimmed it so it overlapped the chine by about 2". I did the second piece the same way setting it up to overlap the opposite lower chine and stretching it over and down along each plank till it was flat down to the gunwales. The result will be 8 ounce coverage of the bottom and 4 ounce fiberglass on the sides and transom. I let the both pieces set overnight. (see picture below).


Sunday, July 1, 2012

Fitting the seats

This went easier than I'd planned. For the sides, I measured the width from the spline center line at the end and at each the frame and support beams. I fit a 1/4" batten to scribe the line. To improve the looks, I extended each seat  beyond the bulkheads for the end seats, and supports for the mid seat into a nice curve using a 48" radius and a french curve. The overlap is between 1 1/2" and 4";  not shown in the picture is a doubler under this extended set for strength and so I can make a nice rounded end. It looks a lot better than straight ended seats. 

I put a 6" hatch in the bow seat and a 4 1/2" in the aft seat. I'd put the hatches at the end of the bulkheads in my other boats, mostly to hide them. But I've found they are difficult to use, usually an exercise and kneeling and groping around for keys, wallet or what ever else got tucked inside. With top mounted hatches will be more handy.

I have an old 10W Minn Kota trolling motor I hung off the standard side (see picture) as a mock up. Though smaller than most available today, it should push this tiny boat fine up the slow rivers and quiet ponds I intend to use it on. I'll pair it up with a U1 deep cycle battery that should give a at least a few hours of power. I'll have to built some sort of tiller extender. I see myself barely moving as I carefully stand up and scout for surfacing trout or crouched down camera and telephoto lens at the ready while I approach some wild life.  


Thursday, June 28, 2012

Seat Supports

To build the seat supports, I first needs to check my CAD dimensions and copy them to the splines. Below shows how I did that with a straight edge, a clamp to hold it against the frame, and combination square. My square has a level which allowed me to confirm I had a slight pitch from the ends; I designed the ends a half inch higher so water would drain towards the center.  
 Here I show the dry fit of the spline, with the cleats clamped on,  and 1 x 3/4" crosspieces. The holes were to save a bit of weight and improve access from the round top hatch you see just to the right--beside they give it that cool airplane look :-). I spaced the crosspieces 8 inches apart and used a level and strait edge to confirm everything was right before marking and epoxy gluing every in. The stern seat was done the same way. Each spline has a limber hole on its low end that you can't see in the picture.

 I used solid clear yellow pine for the aft of the mid seat support. The arching curve are mostly cosmetic and should be as strong as the traditional 1x2" straight hardwood pieces set on edge cleats.
I'll be fitting the seats next time.

Wednesday, June 20, 2012

Quick update.
Created short epoxy fillets between the wire ties and starting to fit the frames. The first picture is a dry fit of the middle frame to double check everything, the 2nd is of the final front frame cut. After this, I'll pull the wire, finish the fillets and epoxy the 2" tape.

Monday, June 18, 2012

planking

I aligned the bottom and used two screws to attach it to the cradle; this will make working and truing everything much simpler as I go. I'm using 20 gauge copper grounding wire for the stitching. It's a good compromise between flexibility and strength. Most of the copper ties were pushed through from the inside because it will be easier to apply the epoxy fillets to the inside. I used a stitch about every foot or so, just making it tight enough to bring the planks together. There's quite a bit of tension at the transom so I've used two stitches per plank.  
   I've epoxied the planks to the stem rabbet. The narrow piece of wood to the right of the stem is to help align perpendicular to the bottom; it would be very easy to mess this part up. The stern will also be done this way.

So far so good. It's nice to see the boat finally taking shape. Next will be epoxy "welding" the planks and framing.