Wednesday, December 30, 2015

Time to build a Sea Kayak

A long time in coming is a new boat. Well I've been working on a kayak for the past six months off and on and now waiting for days it's warm enough for epoxy work in the garage to finish the epoxy work.

So.... over the next couple weeks, I'll be catching you up on my new project.

Ever since kayaking in Maine, I've had the bug to build a sea kayak, get close to the water no other craft, perhaps get a bit of exercise, do some fly fishing and photography in the tiniest of waters and an excuse to make new friends. There's no lack of wood kayak plans available, most speedy and a bit tender craft. I wanted something relatively stable but still possible to roll and recover and it didn't need to be very fast. I'm also no slender man anymore, so wanted something large enough to carry my 200+ pounds, plus perhaps another 50 pounds in mixed fishing, photography camping gear. At the end of the search, I picked a simple design, the Okwata 15-26" by JemWatercraft
Okwata 15-26

Okwata 15-26
Hard chined for respectable maneuverability, a nice shape that should be pretty simple to build and has enough volume to carry me on small overnight adventures. Also like the extra chine just below the shear, something becoming common on many newer designs to reduce paddle width.

Next time I'll review the plan packet and materials.

Monday, August 19, 2013

Enjoyment on Lake Wynoochee

Spent a few days doing what Sundew does best, exploring Lake Wynoochee for a few days. According to my GPS I rowed about 20 miles in the two days, averaging about 3 knots when I was moving. Most times that was very relaxed rowing.
Posted by Picasa

Monday, July 1, 2013

Finishing the oars

Oars are complete... I used Prisma colored pencils to complete the drawings, sprayed a fixure. I used a wood burning tool for the name "Sundew" on the loom and a small sketch of a wood duck taking off on the opposite oar. Applied six coats of spar varnish.

To leather the oars, I cut a squares of 6" by 6" leather each about 1/4" of wrapping around the shaft just below the loom, punched stitching holes (a 1/8" drill works as well) every 3/8" and about 3/16" from the edge. Next I soaked the leather for 15 minutes, than stitched them on using heavy waxed thread. I wrapped 1/2" wide leather strips as buttons and glued them on with Elmer's weather proof wood glue (clamps for one hour). 


After a four hour row yesterday I'm very pleased with the oars. They are light, well balanced and the narrower blades still have plenty of bite. Hey and they look good! What's not to like :-).

Sunday, June 23, 2013

Shaping and art ideas

I rounded the shaft by marking using this rounding jig similar to Jim Michalak's, but using screws 2 3/8" apart and holes centered 1" apart for the pencils. The jig follows the taper and marks where to plane each corner so it's eight sided. 

I further planed off the corners to create a 16 sided shaft. From there I used 80 grit strips of paper, holding each side sanding side to side to round out the shaft. Overall about two hours of work and a bit of sweat but not too difficult. The handles (not shown) were done the same way.

To shape the blades I drew a center line and again hand planed each to a 1/4" beveled edge, checking every few minutes with a 6" straight edge and finishing off with a half sheet pad sander. I further tapered and rounded the shaft past the neck where they sandwich the blades to about 1/4" thick. 
 I sanded everything down with medium grit than fine grit.

I traced art work on each blade which I will fill with colored pencils similar to the dory's art, using water edge plants to stay with the Sundew theme.

Saturday, June 8, 2013

From oar design to wood

Time to start cutting blanks. I followed the general layout shown by Jim Michalak, centering the longer piece that would form the center and drawing the two shorter blanks at mirror ends.


I cut out the center first and decided the fit the hard wood tips before gluing the blanks together. I added a decorative curve, clamped the pine blank and scrap red oak together and them simultaneously with a heavy scroll saw blade so they'd be a good fit. I mixed up a bit of epoxy thickened with oak saw dust and fit into the blades. The results are below. 
 After cutting the blanks on a bandsaw, I carefully aligned the pieces together and drilled a hole for a finish nail in the tripled part of the blade and in the loop that that would keep everything aligned after the glue was applied and clamped. I was low on epoxy, so used Elmer's waterproof wood glue--which I've found works fine as long as the wood doesn't become saturated with water and there's no serious loads. After the glue set, I marked and cut out the taper and handles using bandsaw. The completed oar blanks are below ready for rounding.  

Thursday, June 6, 2013

Oars for Sundew-design

It's been too long since I made a post--too busy enjoying Sundew and other things that get in the way. I've been using a heavy pair of West Marine oars cut down to 7'3" from 8'. They certainly work but have no flex and aren't a good match for the boat. So I've designed to build a set of oars.

I remember building a set nearly 20 years ago out of one piece of wood per oar. One of them warped badly so I don't consider them a success. This time I wanted something light, a bit springy, with better wood and laminated to resist warping. 

Figuring out the length was pretty easy--I like to row with overlapping hands but even than 7'3" was just a bit too long. This new set would be 7' long. Fortunately this matched the recommendation I used from John Leather's Clinker Boatbuilding of half the distance between the locks plus overlap all multiplied by 25/7. For Sundew that's (43"/2 + 2") x 25/7 = 83.9" or just call it 7'. Nice!

Next was my current blades of 5 1/2" by 24" are also a lot more grip than I need and the wind tends to catch them--so I wanted longer narrower blades, perhaps 28" by 4 1/2". 

I found an excellent article by Jim Michalak on oar-building that I'm going to adapt (see
http://www.boatbuilding-links.de/Jim-Michalak/oar-building-and-rowing.htm). He laminates three pieces of standard 1"x 6" good quality pine for each oar. I'll look for some quarter cut at a hardware store, but the lamination will probably minimize warping even if they are flat cut. 

I prefer slightly large tapered handles 1 1/2" to 1 1/4" diameter. John Welsford recommends offsetting oar handles a bit so it's easy to feel the current position of the blade--I'll decide later. I'll also add a hardwood tip to the blade for durability. The loom will remain square to add counterbalancing weight. 

The final dimensions are as follows: 

Saturday, December 29, 2012

Willet Concept drawings

Promised myself I'd do at least one post with honest progress towards my next project. So I'm starting with some basic concept drawings of how I see Willet, my next adventure craft. Originally I'd thought a set of berths would work, but I've noticed that most boats around 16 feet suffer from excessive windage and I assume pointing ability. With that in mind, I've gone with a 4' x 7' flat, set about waterline and drawn the cabin height just enough to sit comfortably inside. For this first drawing, I've added leeboards to clear the cabin space. The cockpit is small, just comfortable for two people, but self-draining with a space for a potta potti under the stern deck and out of the way.

Next I'll work up some primarily cad work see if it's possible to get the stability I need to sail comfortably yet narrow enough to recover from a capsize with my 200 pounds if worse comes to worse. This will help define the cross sections.  


Thursday, November 1, 2012

Rainbows

Today was the sort of days I had in mind for a light rowing boat. After three days of rain and being stuck inside, the rains stopped and the sun started peaking out by early afternoon. I had a few hours to kill, tossed Sundew on my 8 foot utility trailer, tied it down with two lines and drove the 2 miles to the closest water.

I rowed across the small chop to the windward more sheltered side of the pond and started trolling a fly along the South shore. But I'd been a bit too eager, a strong rain shower passed overhead. Luckily I'd tossed a water resistant shell into my day pack but it didn't' help my legs--I'd worn shorts! LOL. If not for the rowing I would have been cold. No sign of trout feeding either.

The shower passed, the wind dropped to a gentle breeze, and a burst of sunshine crossed over me and created a nice rainbow. I made my way back to the ramp, ending the day with another rainbow display. A bit wet and cold I'm still aglow from a good day in the Pacific Northwest.


Sunday, October 28, 2012

Coastal and estuary micro-cruiser


Winter unofficial started here last week. The summer abruptly ended with the first rain in more than three months and hasn't stopped yet. I don't expect to see clear blue for more than a day until April. 

(taken besides Sundew after an tiring 5 mile row against a stiff breeze and harbor chop)

But I imagine a couple years from now, it's late summer, the days made of sparkling clear skies after burning off each morning's fog after a chilly night. 

I crawl out half out of my sleeping bag, situp and look out the port window. Through the dense fog I can make out a heron wading the mud flat where the Preachers slough meets the Chehalis river. The boat's turned towards the river with the incoming tide. Yesterday I slowly worked ten miles down the river tacking under light winds with the ebbing tide. It reminded me of learning to sail rivers in a nine foot Turnabout my grandfather had given me more than 40 years ago.

After a coffee egg breakfast, I tuck the galley box back into the cabin. It takes me only a minute to set sail by unhooking a couple bungees, pulling two halyards and loosely setting the sheets. There's just a ghost of wind. I preposition the oars, work forward to lift anchor, quickly start to row to the river. It's slow going but with little effort the boat is moving a couple knots against the current. The exercise and breakfast help break my chill. The blue heron cries in protest, unfolds it wings and lifts off the water in a few powerful strokes; he's heading downriver, I wonder if I'll see him again in a few minutes.

Today I'll reach Grays harbor, a wide shallow bay, take some pictures and prepare to dash the 40 miles up the exposed coast the next day, or stop in one of the coves along the way. I've been wanting to see Falls Creek from the water, but entering Goodman creek through the rock pile at the mouth would need perfect conditions. If the weather doesn’t' look promising, I'll explore the lower reaches of the Humptulips river and perhaps try to catch a sea run cutthroat for supper. If the weather still doesn't look good the next day, I'll sail to the south end of the bay and explore the Johns River. I'm in no hurry.

What I envision 15 to 16 feet.
A foot or less draft and sit nearly flat when dried out.
Honest 2 person bed flat for V-berths with a place to set my wet feet and shoes out of the rain.
Can make 6 knots in 15 knots winds without white knuckles.
Progress to windward against four foot seas and 20 knot winds under reefed sails.
My 220 pounds can right the boat after a capsize-a rare freaky wind or moment of stupid.
Cockpit for 2 people and a tackle box, self draining.
No board that splits the cabin—twin boards, one off center or a leeboards.
Enclosure or cut out for a 2 to 4 four-stroke outboard plus fuel can so it's out of the way.
Space for a couple deep charge batteries and a 5 amp solar panels.
Can rig from trailer to sail away in 15 minutes by myself.
A porti potti space in the cockpit.
Tabernacle mast(s) I can lift with one arm to pass under bridges.

Best matched designs:
John Welseford's Pilgrim—tough and nearly has me smitten, won't sit flat.
John Harris/CLC Pocketship—cute, won't sit flat.
Welseford's Tread lightly—Close. Perhaps stretched 10%? Raised flat cabin floor? Leeboards?
Selway Fisher's Goshawk & Heron 15-- heavy but purposeful
John Pruitt's No Frills 15---worth mentioning; clever cabin but a bit homely looking; doubt it's weatherly.
Sam Devlin's Nancy's China—cute, not crazy about dagger board that split the cabin.
Jim Michalak's Oliveoyl--functional but not crazy about slab sided look. 


Her her name will be Willet or Selkie.


Monday, August 20, 2012

Testing to destruction

One of my first post I mentioned some of the other boats I've built. (I'm a serial boat builder). One that sat in the harsh WA weather for nearly 3 years had rotted so badly I decided to cut it up and haul it to the dump. It was a good chance to look at where the wood failed as well as the construction durability.

The extent of the delamination. Even marine plywood has limits--this boat was outside, uncovered for 3 years with "protected with two coats of latex exterior house paint (I won't do that again).

The Seat fillets were still strong.

Doublers and siliconed plastic hatches stayed dry and strong.

 A good look at the tape and seam cross section--no rot.
 The top of the dagger board and seat did not have doublers and were only varnished to protect the end grains. Even though the boat was upside down--it obviously wasn't enough. Epoxy seal your end grains!

Saturday, August 4, 2012

Enjoyment

This is mostly about using the dory to explore South Puget sound near Nisqually reach. It was a warm, clear blue day with a 14 foot tide and gentle winds except for kicking up to about 12 knots or so for an hour or so. I rowed down a small river, across the reach and back, a total of about 8 miles in mostly near calm water except for some strong currents and just enough wind to kick up some 1 foot waves. Hardly a good test or her full capabilities, but an excellent way to get used to the boat and take some nature pictures--what I built the boat for.
I did get around to weighing the boat and was delighted to find it was only 69 pounds.
Some pictures of my day.


Thursday, July 26, 2012

Chaffing Keel Protection

After scuffing up the bottom from my first two trips, I decided to add the 3/8" half round brass protection. I rounded off the bow a bit but it went on pretty easy. I fastened the brass with copper nails. To help drill holes into a half round I filed thin slot with a diamond file, and drilled a 1/8" hole about every six inches with an addition nail hole to support the bend points. I bedded the half round in silicon, but it probably wasn't necessary. I gently tapped the flat nail heads onto the brass, and filed the front edges to minimize them getting caught and torn off if I drag the boat up on a beach.


Monday, July 23, 2012

Final touches

Nearly complete. Close enough to Launch! 

Couple coats of varnish, two coats of paint inside and out and hatches finally on. Couldn't resist the urge to launch it for the first time and take my wife for a leisurely row down a slow river.


I'll add at least one more coat of paint to the inside, and another two coats of varnish on the decks as well as build a respectable cover so she last a lifetime. 
--
I finally uncovered the art work on the deck supports/backrest. The bow has the boat name "Sundew," while the stern backrest has a water lily and a dragonfly. I drew them with colored pencil. 


I'll right about its performance in more detail once I use it move. But for now I'll say I'm happy. With my wife rear seat and me rowing from the bow seat, she's well balanced. Stability was also good with just a tad dory- like instability within about 5 degree but firms up solid past that point--the wife found it comfortable after the first minute or so; I also felt comfortable with my expensive camera--there's no surprises in her gentle Swampscott dory shape. She rowed as well with the 7 foot oars as any boat its size, a couple sweeps getting her up to 4 knots or so.

Saturday, July 21, 2012

Front deck

Placing the front deck turned out to be more adventurous than I thought it would be. On a prior boat, I'd mounted a small deck with only one supporting beam at the end. That was pretty easy the plywood bending it's own radius down to the gunwale and remaining relatively straight. This deck didn't go so easy--it's longer and the shear line has a good bend. 

When I dry fit the front deck, rather than stay straight up the center line, it bent down taking a stressed compound and unflattering curve from the stem to the arched support deck. I had two choices. One is I could add a few support beams, but I wanted to use that only as a last resort because I wanted to keep the weight down. My other preferred option was to screw a temporary center line straight beam, clamp down the plywood to the sheer line, wet the plywood until it took on the right compound shape and then let it dry to keep that shape. I used 18 clamps and wet hot towels for a few hours that letting it dry overnight.   

You can see the results below. You'll probably not I've started painting. Boat is coming along nicely. 


Sunday, July 15, 2012

Wooden cleats

To take a short break from the boat building, I decided to make wooden cleats for this dory. 

I learned with a prior boat that top mounted cleats are a pain to car top because they get caught up in the carrier crossbars so I decided to mount them sideways under the inwales and abutting the frames for strength. I won't use any larger than 3/8" rope so the cleats could be small--no longer than 3" long with a 1" base. Some scrap white oak would work fine. I made simple template of 1/4" ply, traced them on the oak and measured each frame to the correct angle so the cleats would be parallel with the inwale. The pictures show the blank with initial cuts and holes from 3/8 inch drill for rounding sides and base. .


The next picture shows the 4 blanks just about to be separated--I did it this way so it would be easier to to handle while I used the band saw for the straight cuts and jig saw for the curves. 


I mounted the tall base in a vice and did the final shaping with a rasp tapering them down to 3/8" in each end, the refining the shape with file and finally course grit sandpaper. 


The last picture shows the mounted cleat.  

Friday, July 13, 2012

Gluing the seats

Turned the hull over. During the last boat I built, I forgot to paint under the seats before they were epoxied down; what a pain (I did it with a my arm covered in a elbow high glove and several cans of spray paint. I didn't repeat that mistake.

I marked up where supports landed under the seat and painted between them as well as the compartment. The picture also shows the hatch plate support and the doubler that fits under curved extension beyond the bulkhead support.


To fit the seat, I covered the bare wood underneath with thickened epoxy, used a few clamps where they could reach and used drilled through round scraps down the center line into the support splines to hold everything down. On prior boats, 

On prior boats, I've added support cleats and used fiberglass to tape the seat to the sides. On this boat, I decided to forgo the cleats and and add thickened epoxy faired to the sides. The first batch of epoxy was too thin and some ran into the hatch--wasting an ounce or so, but it's all hidden and was easy to fix.  


More bottom work

After a day of letting the dry fiberglass settle it was time for the epoxy. Started on a cool morning so I'd get plenty of time to work each batch and spread it slowly using a 3" plastic spreader. I started from the top centerline, giving it time to saturate the two layers of 4 ounce cloth and working it down the sides. I finished with the transom and was glad I'd rounded over the planks.

About eight hours later, I decided to apply the box rubbing strake and skeg I'd already fitted out. Any longer and I'd loose the chemical bond between the fillet supporting the skeg and fiberglass. You'll note in the picture I used a chalk line down the center line to help.


I also cut along the blue painters tape with a sharp razor and pulling the still flexible fiberglass. It's a trick I'd seen Warren Messer of redbarnboats use on one of his YouTube videos that worked really well. 

The rest didn't go so well. I mixed in a too much filleting blend into the epoxy to fill the weave. It made the 2nd layer a lot harder to apply and added more work to get a smooth finish. I finished the skeg fillets at this point with a thicker bonding filler. After a light sanding it's ready for paint. 


Friday, July 6, 2012

Fiberglass the bottom

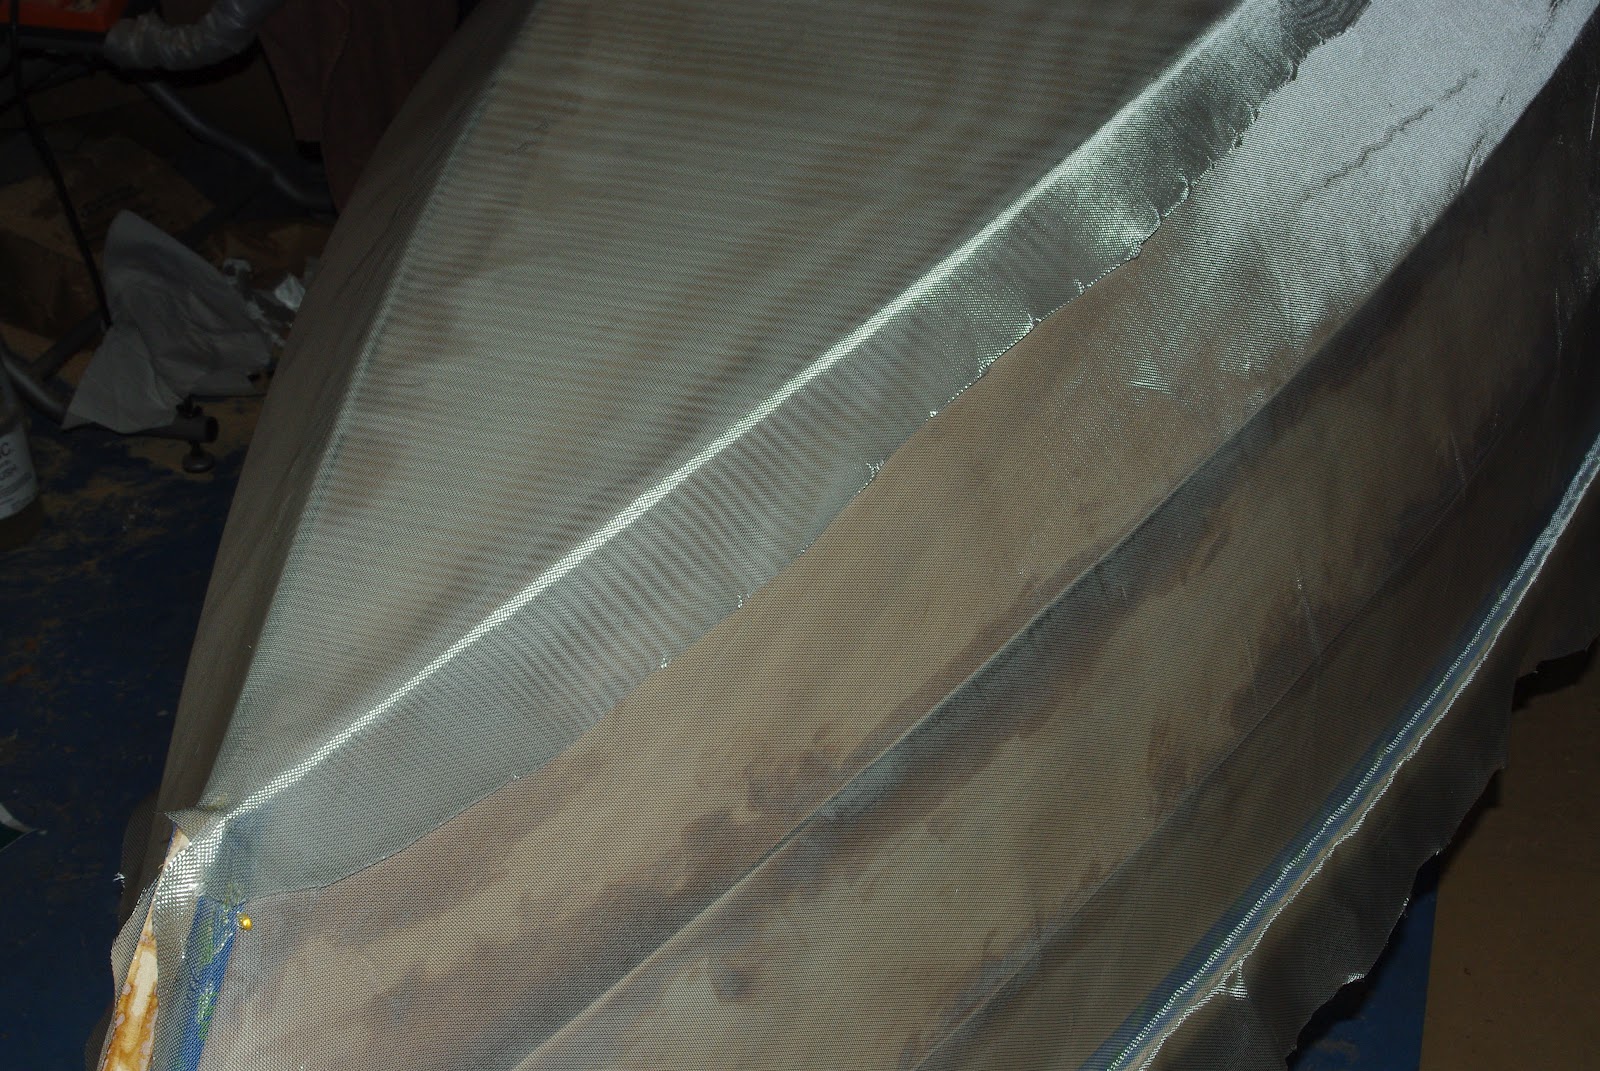
I decided to use 4 ounce fiberglass on the outside, but doubled in two layers over the bottom and lower chine. I needed two 50" wide overlapping strips. I applied 1" blue painters tape close to the gunwale. Next I laid out the first piece to completely cover the bottom plank dry carefully then running my hands stretching it down each plank and tacking it down with small dabs from a glue gun on top of the painters tape. I trimmed it so it overlapped the chine by about 2". I did the second piece the same way setting it up to overlap the opposite lower chine and stretching it over and down along each plank till it was flat down to the gunwales. The result will be 8 ounce coverage of the bottom and 4 ounce fiberglass on the sides and transom. I let the both pieces set overnight. (see picture below).


Sunday, July 1, 2012

Fitting the seats

This went easier than I'd planned. For the sides, I measured the width from the spline center line at the end and at each the frame and support beams. I fit a 1/4" batten to scribe the line. To improve the looks, I extended each seat  beyond the bulkheads for the end seats, and supports for the mid seat into a nice curve using a 48" radius and a french curve. The overlap is between 1 1/2" and 4";  not shown in the picture is a doubler under this extended set for strength and so I can make a nice rounded end. It looks a lot better than straight ended seats. 

I put a 6" hatch in the bow seat and a 4 1/2" in the aft seat. I'd put the hatches at the end of the bulkheads in my other boats, mostly to hide them. But I've found they are difficult to use, usually an exercise and kneeling and groping around for keys, wallet or what ever else got tucked inside. With top mounted hatches will be more handy.

I have an old 10W Minn Kota trolling motor I hung off the standard side (see picture) as a mock up. Though smaller than most available today, it should push this tiny boat fine up the slow rivers and quiet ponds I intend to use it on. I'll pair it up with a U1 deep cycle battery that should give a at least a few hours of power. I'll have to built some sort of tiller extender. I see myself barely moving as I carefully stand up and scout for surfacing trout or crouched down camera and telephoto lens at the ready while I approach some wild life.  


Thursday, June 28, 2012

Seat Supports

To build the seat supports, I first needs to check my CAD dimensions and copy them to the splines. Below shows how I did that with a straight edge, a clamp to hold it against the frame, and combination square. My square has a level which allowed me to confirm I had a slight pitch from the ends; I designed the ends a half inch higher so water would drain towards the center.  
 Here I show the dry fit of the spline, with the cleats clamped on,  and 1 x 3/4" crosspieces. The holes were to save a bit of weight and improve access from the round top hatch you see just to the right--beside they give it that cool airplane look :-). I spaced the crosspieces 8 inches apart and used a level and strait edge to confirm everything was right before marking and epoxy gluing every in. The stern seat was done the same way. Each spline has a limber hole on its low end that you can't see in the picture.

 I used solid clear yellow pine for the aft of the mid seat support. The arching curve are mostly cosmetic and should be as strong as the traditional 1x2" straight hardwood pieces set on edge cleats.
I'll be fitting the seats next time.